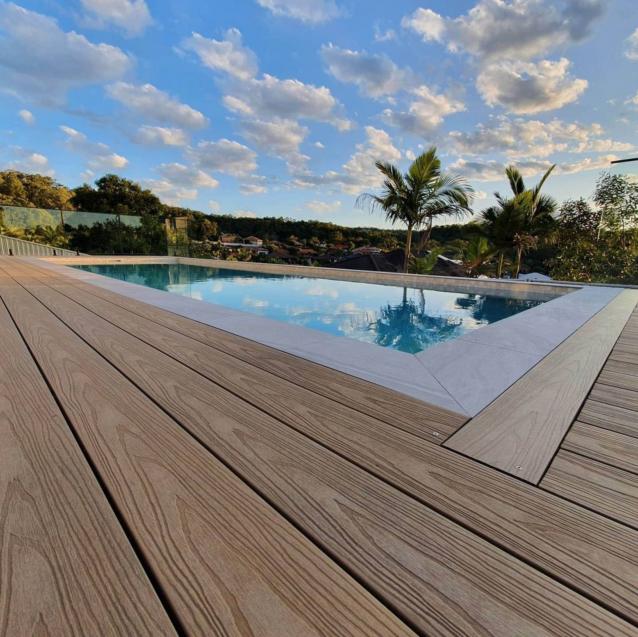
How to Choose and Install Decking Screws
By Ezy Decking|January 22, 2024
If you're on a mission to transform your outdoor space into a cosy, family-friendly haven, you've come to the right place. Decking is not just about the boards and design; it's the little things – like the screws – that hold it all together. That's where this guide comes in, helping you select and install the perfect deck screws for a flawless finish.
We know that the prospect of enhancing your outdoor living area is exciting. It's a chance to create a space where memories are made, laughter is shared, and tranquillity is found. Here at Ezy Decking, we share your enthusiasm and are committed to guiding you through this transformative journey. Our expertise, honed over 25 years in the DIY and timber industry in the UK and Australia, ensures that the advice you receive is not only expert but also easy to understand and implement.
In this guide, we’ll discuss everything you need to know about deck screws – a seemingly small component that plays a pivotal role in the longevity and safety of your deck. From the different types available to the specifics of installation, we've got you covered.
Why Deck Screws Matter
When you’re crafting that perfect deck for your home, every detail counts, especially the ones you might not see at first glance. This is where deck screws come in – small yet mighty, they are the linchpins holding your dream deck together. You might wonder, "Why put so much thought into something as simple as screws?" Well, these little guys are the unsung heroes of deck stability and durability.
The Role of Deck Screws in Structural Integrity
Imagine your deck as a puzzle, where every piece needs to fit perfectly. Deck screws are the connectors that hold these pieces in place. They’re responsible for keeping your deck boards secured to the joists, ensuring that the entire structure remains stable and firm. But it's not just about keeping things together; the right screws play a crucial role in coping with the natural expansion and contraction of wood due to weather changes. Inferior quality screws or incorrect installation can lead to loose boards, creaks, and, ultimately, a compromised deck structure.
Enhancing Longevity with the Right Screws
The longevity of your deck heavily relies on the type of screws you choose. Opt for screws specifically designed for decking, preferably ones that are corrosion-resistant. This is particularly important in outdoor settings where moisture and environmental factors come into play. For instance, stainless steel screws, though a bit more expensive, can significantly extend the life of your deck. They resist rust and corrosion, which means they’ll hold your deck together longer, and maintain its pristine look without unsightly rust stains.
Types of Deck Screws and Their Uses
Choosing the right deck screw is like selecting the perfect accessory for your favourite outfit – it might not be the most noticeable part, but it makes all the difference in the overall look and longevity. Here are the various types of deck screws and where and why each type shines.
Stainless Steel Screws
Stainless steel screws are the go-to choice for many decking projects. Why? Because they're rust-resistant and incredibly strong. If you're building a deck in an area with high humidity or near the ocean, these screws are your best bet. Their corrosion-resistant nature ensures that your deck stays secure and beautiful for years, even in salty sea air.
Coated Screws
These beauties come in various colours to match your decking material, creating a seamless look. They're not just about aesthetics, though. The coating provides an extra layer of protection against corrosion and wear. If your deck is in a sunny spot, coated screws are a smart choice as they're less likely to fade or discolour over time.
Composite Deck Screws
For those of you using composite decking materials, composite deck screws are your perfect match. These screws are specifically designed to work with composite boards. Their unique design prevents the material from bulging or mushrooming at the screw head – a common issue with regular screws in composite materials.
A Tip for Climate Consideration
When selecting your screws, consider not just the material of your deck, but also the climate you live in. For example, if you're in a wetter climate, opt for stainless steel or coated screws to prevent rust. In dryer, hotter climates, coated screws can help protect against sun damage.
And if you're using softer woods, like cedar or redwood, choose screws with a sharper point and deeper threads. This ensures a tighter grip without splitting the wood. For harder woods or composite materials, look for screws designed to handle these tougher surfaces without causing damage.
Selecting the Perfect Screw for Your Deck
Length and Diameter: The Backbone of Your Deck
The rule of thumb here is simple yet vital: your screws should be at least three times longer than the thickness of the decking boards. Why, you ask? Because you want that solid grip, ensuring your boards stay firmly in place. Think of it like planting a tree – the deeper the roots, the sturdier it stands.
When it comes to diameter, thicker screws mean a stronger hold. But don't go too thick; you don't want to split those gorgeous boards. It's a delicate balance, like picking the right-sized belt for your favourite pair of jeans.
Material
In the world of deck screws, you've got options like stainless steel, coated, and even specialised composite deck screws. Stainless steel is the go-to for its rust resistance – perfect for those decks exposed to the elements. Coated screws, on the other hand, offer an extra layer of protection against corrosion, making them ideal for areas with harsh weather conditions.
Head Type
The head type of your screw might seem like a small detail, but it's a game-changer. You've got flat heads, bugle heads, and more. Flat heads are great for a smooth finish, while bugle heads are designed to sit flush with the surface, reducing the chance of snags. It's like choosing the right hat – it might not be the first thing you notice, but it makes all the difference in the overall look.
Matching Screw Type to Decking Material
The key to decking longevity is matching your screw type to your decking material. For instance, if you're working with softwood, you'll want a screw that's sharp and can easily penetrate without splitting the wood. For harder materials, like composite, choose a screw designed to cut through tough surfaces without causing damage.
Tools You'll Need for Installing Deck Screws
Before we dive into the nuts and bolts of installing your deck screws, it's essential to gather the right tools. Having these on hand will not only make your job easier but also ensure that your deck is as sturdy as it is stunning. Here's a list of must-haves for installing deck screws:
1) Power Drill
The cornerstone of your tool kit. A reliable power drill will drive your screws into the decking quickly and efficiently. Opt for one with adjustable torque settings to prevent overdriving the screws.
2) Screwdriver Bits
These are the bridge between your drill and the screws. Make sure to have the right size and type to match your deck screws. A good fit prevents stripping the screw head and ensures a smooth installation.
3) Tape Measure
Precision is key in decking. A tape measure will help you space your screws evenly, ensuring a uniform and aesthetically pleasing finish.
4) Drill Bit Set
Especially useful if you're pre-drilling holes, which is recommended for certain types of decking. The right drill bit will create a pilot hole that perfectly fits the screw, reducing the risk of splitting your beautiful decking material.
5) Carpenter's Pencil or Marker
For marking drill spots. It's all about accuracy, and marking where each screw will go can make a big difference in the final look and integrity of your deck.
6) Level
An often-overlooked hero. A level ensures your deck boards are perfectly horizontal and aligned. This is crucial for both aesthetic and functional reasons.
7) Safety Gear (Gloves and Goggles)
Safety first! Gloves will protect your hands, and goggles are a must to shield your eyes from any flying debris while drilling.
8) Adjustable Wrench or Socket Set
In case you need to tighten any bolts or nuts in your deck construction. It's always good to be prepared!
9) Speed Square or Framing Square
For ensuring perfect angles and corners. This is especially important if your deck design includes any kind of geometric patterns or features.
Step-by-Step Guide to Installing Deck Screws
Installing deck screws might seem straightforward, but doing it right is key to ensuring your deck’s stability and longevity. Let's walk through this process step by step, ensuring you understand the why's and how's, making your decking project as smooth and successful as possible.
- Preparing Your Decking Area
- Before you start, make sure your decking area is clear and ready. This means checking for any obstructions and ensuring your boards are aligned and properly supported. Why? A well-prepared area ensures a smoother installation process and helps prevent issues down the line.
- Choosing the Right Drill Bit
- Select a drill bit that matches the size of your deck screws. This is crucial for creating the right-sized pilot holes. Why? Using the correct drill bit size prevents wood splitting and ensures your screws fit snugly, providing maximum hold.
- Drilling Pilot Holes
- Carefully drill pilot holes at your marked screw locations. Why? Pilot holes guide the screws and prevent wood from splitting, especially near the edges of the boards. They also make screwing easier and more precise.
- Countersinking (If Necessary)
- For certain types of deck screws, you might need to countersink the holes. Why? Countersinking ensures the screw heads sit flush with or slightly below the surface of the wood, creating a smooth, trip-free finish and enhancing the aesthetic appeal of your deck.
- Aligning the Screws
- Place your screws into the pilot holes, ensuring they're perfectly aligned. Why? Proper alignment prevents the screws from going in at an angle, which can weaken their hold and potentially damage your decking material.
- Driving in the Screws
- Using your drill, drive the screws into the wood until the head is flush with or just below the surface of the decking. Why? This provides a strong, secure hold and prevents any protrusions that could catch on feet or furniture.
- Checking for Consistency
- After installing a few screws, take a step back and check for consistency in depth and alignment. Why? Regular checks ensure uniformity in your work, affecting both the structural integrity and visual appeal of your deck.
- Final Inspection
- Once all screws are in place, do a final inspection of your deck. Why? This is your opportunity to catch any issues like misaligned screws or uneven areas and correct them, ensuring your deck is as safe and beautiful as it can be.