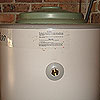
Replacing a Hot Water Heater
By PAV Plumbing Sydney|February 21, 2008
Replacing a Hot Water Heater
A hot water heater is a home appliance often taken for granted. That is, until all that comes out of the tap is icy water, never pleasant when someone wants to take a bath. When cold water is all your hot water heater has to offer, though, an easy repair or a replacement can set a home back into the lap of heated luxury.Picking a New Hot Water Heater
The best replacement unit for a hot water heater is usually new model of similar capacity and size to the old unit that is being removed. Choosing a similar but new hot water heater involves less improvisation and easy connection. Deciding to opt for a new method of heating, such as electric to gas or vice versa, becomes somewhat more complicated and may require a professional’s services, especially to determine if the alternative heating method is a change worth pursuing.Several models of hot water heaters offer more efficiency. Demand water heaters eliminate the need for a storage tank. Heat pump water heaters use a source of heat already available, such as a warm room or geothermal options. An indirect water heater uses a space heating system, as does a tankless coil, and solar water heaters use the sun’s power to create warm water. Some varieties of alternative water heating options combined with a conventional hot water heater for additional efficiency, though installing and incorporating these options into the home can be costly.
Removing the Old Unit
Never smoke during any installation or repair involving a gas heater while the gas line is disconnected. This includes not only in areas near the heater but in the whole home as well.Exchanging an old hot water heater with a new and similar model requires disconnecting the unit to be changed by closing the water, and shutting off the gas supply or unplugging the unit if it is electric. The electric cord may need to be disconnected from the hot water heater, but mark wires so that the installer can tell them apart later on. A gas model requires disconnection of the gas line from the controls of the pilot light, and the line should be capped so no gas escapes.
Remove as much water from the tank as possible by opening the drain valve at the base of the unit. For homes with no floor drain, an option is to attach a garden hose and drain the tank that way. Make sure that where the hose drains isn’t an area that may be damaged from the hot water. To allow for proper draining, open a hot water faucet elsewhere in the home to air the system.
When the hot water heater is drained, use two wrenches to disconnect the unions (threaded fittings) of the pipes of the water lines located at the top of the tank. Or, use a hacksaw or pipe cutter. When the hot water tank is free from its fittings, remove the unit.
Installation
Before installing the new tank, refer to the owner’s manual for installation recommendations and instructions, as some models may have unique features. For gas models, place the hot water heater where it should sit, attach the draft hood, and reconnect the gas lines.When connecting the hot water heater to the water lines, use threaded flex-connectors if your system doesn’t have PVC pipes. Threaded flex-connectors require the least maintenance and are the easiest to install. Use plumbers’ tape to wrap all pipe threads for leak prevention.
Once the step of attaching water lines is complete, leave a hot water tap elsewhere in the house open and running, and then open the lines attached to the hot water heater so that the unit will fill. When the tank is full, allow the open faucet to run for a minute more to ensure air isn’t trapped in the system. The system is ready to have wiring connected for electric supply or gas turned on and the pilot light lit. The water in the tank will start heating.
When in doubt, call a professional plumber to help with the task.
