What Is The Process For Applying Cement Render To A Wall?
By Jim's Rendering Sydney|April 12, 2023
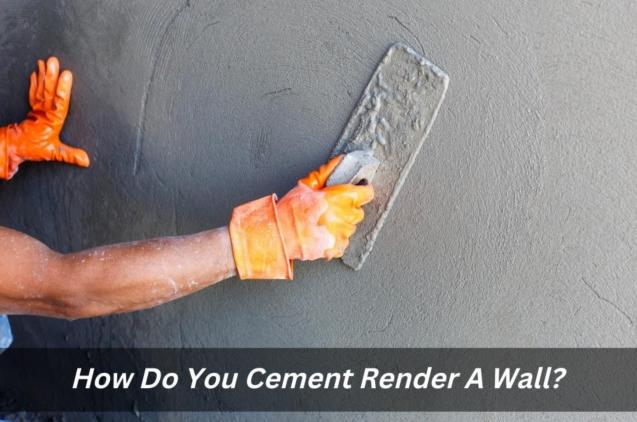
Are you looking to transform the look of a wall without spending too much money? Cement rendering is an effective, affordable way to give your walls a fresh new look. Whether you’re wanting to spruce up a room in your home or add some visual appeal to the exterior of your property, cement rendering can be an attractive and long-lasting choice.
It is a popular way of enhancing the appearance of walls, both inside and outside the home. It involves applying a layer of cement render to a wall’s surface which can then be painted or left as is for an attractive rendered finish. Rendering provides a durable, waterproof barrier that protects against moisture damage, making it ideal for exterior walls.
It can also be used internally to provide a smooth finish which allows paint or wallpaper to adhere better. It is relatively simple to apply and costs less than other materials such as brickwork or tiles, making it an accessible alternative for many homeowners. In this article, we’ll explain how to cement render a wall step-by-step so that you can tackle the job with confidence. We’ll also discuss the benefits of looking for a professional “cement rendering near me” for an expert rendering job.
1. Gather the necessary tools and materials
When it comes to cement rendering, there are a few tools and materials you will need to get the job done properly. This includes a concrete mix, trowel, finishing brush, hawk, ladder, mixing tub and bucket. You will also need to purchase any protective equipment such as gloves and goggles as well as personal safety items such as ear protection.
Once you have gathered all of the necessary tools and materials for your project, you can begin your rendering process. It is important to make sure that everything is in good condition before beginning work so that you can ensure the highest quality of finish possible.
2. Preparing the wall for render
Before beginning the process of cement rendering, it is important to prepare the wall properly. This includes cleaning off any dirt or debris as well as ensuring that any cracks or imperfections are filled in. If you are applying the render or a coat of paint prior to rendering, make sure that it is completely dry before you begin.
Additionally, you should ensure that the wall is free from grease and oil deposits as these can affect the quality and durability of the render. Once the wall has been prepared properly, you can begin applying a layer of render.
3. Prepare and apply the first coat of render
Once you have prepared the wall, the next step in cement rendering is to apply the first coat of render. The best way to do this is to mix together a solution of sand and cement, which should be spread evenly over the wall with a trowel. This layer should be around 5mm thick and applied evenly over the entire surface. If necessary, you can use a straight edge or levelling tool to ensure that the layer is flat and even.
4. Apply the second coat of render
Once the first coat of render has had a chance to dry, it's time to apply the second coat. This layer should be around 10mm thick, and again you should use a trowel to spread it evenly across the wall. Once this is done, you should leave it for 24 hours before continuing with the process. Ensure that you press firmly on each section of the render so that it adheres properly, and use a straight edge or levelling tool to check that everything is even and flat.
For extra strength and increased longevity, you can also add an acrylic render during this stage – simply mix it in with the sand and cement solution before applying it as normal. Finally, allow the final layer of render to dry thoroughly before continuing with painting or other finishing touches.
5. Finishing touches and optional decorative finishes
The final step in rendering a wall is the finishing touches. Once the render has dried and hardened, it can then be painted or otherwise decorated according to preference. For a smooth finish, sandpaper can be used to give the wall an even texture. Alternatively, for a more decorative look, special tools such as sponges and brushes can be used to create interesting patterns on the surface of the render.
This is an especially useful technique for those wanting to add interest to interior walls. Other decorative finishes include stucco and brick slips, which can also be added at this stage for further effect. Ultimately, it's up to personal taste and budget when deciding which decoration techniques are best suited for the project – but with a little imagination and creativity, rendered walls can make a huge difference in any home!
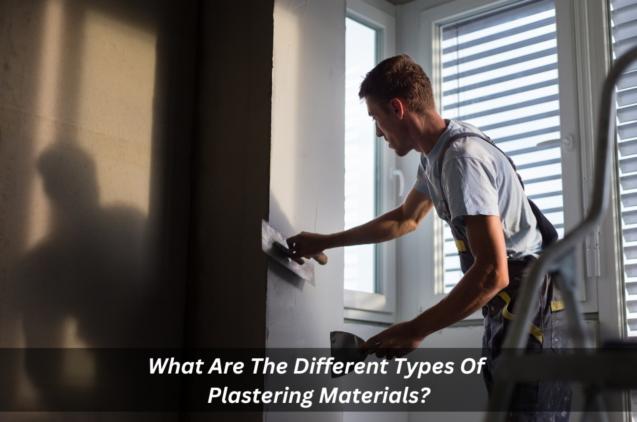
6. Professional cement rendering services near you
Professional cement rendering can transform your house. For those who are looking for an expert rendering job, it is worth considering the local area and seeking out companies that specialise in cement rendering. Rendering professionals have the necessary skill and expertise to ensure a high-quality finish, as well as an understanding of the best materials, rendering cost and techniques for specific projects.
Furthermore, they can provide advice on the best way to apply concrete render and paint depending on the flat surface – whether it be an exterior wall or an interior wall – as well as offer additional services such as sanding and painting.
Professional services will also be able to advise on different types of render, from acrylic to sand and cement, giving customers the choice of a range of finishes for their project. In conclusion, engaging professional help for your cement rendering project ensures the best results and peace of mind.
It is a popular way of enhancing the appearance of walls, both inside and outside the home. It involves applying a layer of cement render to a wall’s surface which can then be painted or left as is for an attractive rendered finish. Rendering provides a durable, waterproof barrier that protects against moisture damage, making it ideal for exterior walls.
It can also be used internally to provide a smooth finish which allows paint or wallpaper to adhere better. It is relatively simple to apply and costs less than other materials such as brickwork or tiles, making it an accessible alternative for many homeowners. In this article, we’ll explain how to cement render a wall step-by-step so that you can tackle the job with confidence. We’ll also discuss the benefits of looking for a professional “cement rendering near me” for an expert rendering job.
1. Gather the necessary tools and materials
When it comes to cement rendering, there are a few tools and materials you will need to get the job done properly. This includes a concrete mix, trowel, finishing brush, hawk, ladder, mixing tub and bucket. You will also need to purchase any protective equipment such as gloves and goggles as well as personal safety items such as ear protection.
Once you have gathered all of the necessary tools and materials for your project, you can begin your rendering process. It is important to make sure that everything is in good condition before beginning work so that you can ensure the highest quality of finish possible.
2. Preparing the wall for render
Before beginning the process of cement rendering, it is important to prepare the wall properly. This includes cleaning off any dirt or debris as well as ensuring that any cracks or imperfections are filled in. If you are applying the render or a coat of paint prior to rendering, make sure that it is completely dry before you begin.
Additionally, you should ensure that the wall is free from grease and oil deposits as these can affect the quality and durability of the render. Once the wall has been prepared properly, you can begin applying a layer of render.
3. Prepare and apply the first coat of render
Once you have prepared the wall, the next step in cement rendering is to apply the first coat of render. The best way to do this is to mix together a solution of sand and cement, which should be spread evenly over the wall with a trowel. This layer should be around 5mm thick and applied evenly over the entire surface. If necessary, you can use a straight edge or levelling tool to ensure that the layer is flat and even.
4. Apply the second coat of render
Once the first coat of render has had a chance to dry, it's time to apply the second coat. This layer should be around 10mm thick, and again you should use a trowel to spread it evenly across the wall. Once this is done, you should leave it for 24 hours before continuing with the process. Ensure that you press firmly on each section of the render so that it adheres properly, and use a straight edge or levelling tool to check that everything is even and flat.
For extra strength and increased longevity, you can also add an acrylic render during this stage – simply mix it in with the sand and cement solution before applying it as normal. Finally, allow the final layer of render to dry thoroughly before continuing with painting or other finishing touches.
5. Finishing touches and optional decorative finishes
The final step in rendering a wall is the finishing touches. Once the render has dried and hardened, it can then be painted or otherwise decorated according to preference. For a smooth finish, sandpaper can be used to give the wall an even texture. Alternatively, for a more decorative look, special tools such as sponges and brushes can be used to create interesting patterns on the surface of the render.
This is an especially useful technique for those wanting to add interest to interior walls. Other decorative finishes include stucco and brick slips, which can also be added at this stage for further effect. Ultimately, it's up to personal taste and budget when deciding which decoration techniques are best suited for the project – but with a little imagination and creativity, rendered walls can make a huge difference in any home!
6. Professional cement rendering services near you
Professional cement rendering can transform your house. For those who are looking for an expert rendering job, it is worth considering the local area and seeking out companies that specialise in cement rendering. Rendering professionals have the necessary skill and expertise to ensure a high-quality finish, as well as an understanding of the best materials, rendering cost and techniques for specific projects.
Furthermore, they can provide advice on the best way to apply concrete render and paint depending on the flat surface – whether it be an exterior wall or an interior wall – as well as offer additional services such as sanding and painting.
Professional services will also be able to advise on different types of render, from acrylic to sand and cement, giving customers the choice of a range of finishes for their project. In conclusion, engaging professional help for your cement rendering project ensures the best results and peace of mind.